If your doors look scuffed, shiny in the wrong places, or just tired, a fresh coat of paint can change how every room feels. This guide breaks down how to paint interior doors the right way—clean edges, smooth surfaces, and a durable finish that stands up to daily use. Follow this plan, and you’ll get results that look like they came from a seasoned pro.
Why Doors Are Tricky—and Worth It
Doors live a tough life. They get fingerprints, bag-related bumps, pet scratches, and constant edge contact. They also sit at eye level, so any flaws in preparation or application are noticeable. Done well, though, painted doors frame your rooms with crisp color, reflect light, and make trim work look high-end—even if you change nothing else.
Choose Your Finish: Paint Types That Last
Selecting the right coating is half the job.
- Waterborne Acrylic (or Acrylic-Alkyd) Enamel: Levels smoothly like oil, but has low odor and soap-and-water cleanup. Great blocking resistance to prevent doors from sticking.
- Traditional Oil/Alkyd: Still the king of leveling and hardness, but slow to dry and higher odor.
- 100% Acrylic Latex Enamel: Durable, fast-drying, easy cleanup. Excellent for most homes.
Sheen: Semi-gloss is the classic for doors—wipes clean and hides smudges. Satin is softer and works well in modern spaces. Gloss is striking but unforgiving; every small defect shows.
Color Tip: White stays timeless, but deep hues (charcoal, navy, black, olive) give instant drama. If your trim is white, a colored door can be the feature without overpowering the room.
Remove the Door or Paint in Place?
Both paths work—choose based on time, space, and your comfort level.
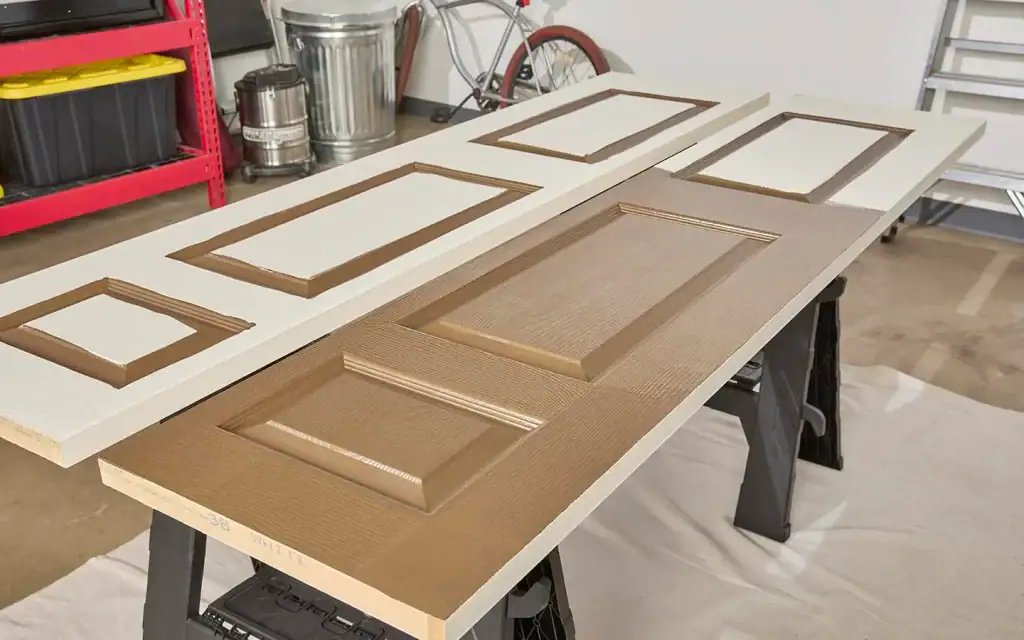
- Take the door down: Best for beginners. Lay it flat on the stands. Gravity helps paint level and reduces drips.
- Leave it hanging: Faster overall and avoids re-hanging. Mask hardware, work carefully, and control runs.
If removing, label hinge locations and use a wedge or helper when rehanging to avoid scuffs.
Tools and Materials Checklist
- High-quality sash brush (angled, 1.5–2.5 in)
- Mini-roller (4–6 in) with microfiber or mohair cover, 1/4″ nap for smooth leveling
- Quality painter’s tape and masking paper/plastic
- Tack cloths or lint-free rags
- Degreaser or mild cleaner, bucket, and sponge
- Liquid deglosser (for glossy factory finishes)
- Spackle/wood filler, putty knife
- Sandpaper: 120, 150–180, 220 grits; sanding block or pad
- Vacuum with brush attachment or microfiber cloth
- Quality primer (bonding or stain-blocking as needed)
- Enamel door paint (see finish section)
- Door stops/stands, drop cloths
- Optional: Paint conditioner compatible with your paint (improves flow and leveling)
Prep the Space
Clear a staging area with good airflow. Lay drop cloths. If painting in place, pull furniture back and mask the walls and flooring near the door. Remove or mask hardware (knob, strike plate). If you’re new, fully removing knobs is easier than taping perfect circles.
Surface Prep: The Difference Maker
- Clean: Wash both sides with a degreaser or mild cleaner. Hand oils are the #1 reason paint doesn’t bond along edges and near the latch. Rinse and dry.
- Scuff-Sand: Sand lightly with 150–180 grit to dull the sheen and smooth out minor imperfections. Wipe dust with a damp cloth, then a dry one.
- Fill and Fix: Press spackle or wood filler into dents and chips. Let it dry, then sand it smooth with 220-grit paper. Feather the edges so repairs disappear.
- De-Gloss (If Needed): For slick, factory-finished doors, rub liquid deglosser on a lint-free cloth and wipe the entire surface. Follow directions and allow the suggested wait time.
- Dust Control: Vacuum the door surface and joints. Dust ruins finishes more than any other factor.
Prime with Purpose
Primer is required if you’re changing color, painting over a glossy or oil finish, or addressing stains/knots.
- Bonding Primer: Bonds to slick, prefinished surfaces (common on hollow-core doors).
- Stain-Blocking Primer: For knots, marker, nicotine, or water staining.
- Spot-Prime Repairs: Even if you skip full prime on a previously painted door with intact paint, at least prime patches and edges.
Sand the primer lightly with 220 once dry for a glassy base. Wipe clean.
Sequence Matters: How to Paint Interior Doors (The Order)
The order you paint prevents lap marks and keeps edges clean.
A) Paneled Doors (Most Common)
- Panels (inside the recesses) first: Use your sash brush to cut the edges and a mini-roller to fill the flat parts.
- Horizontal Rails: Work from top to bottom. Brush edges, then roll the flats.
- Vertical Stiles: Finish by rolling the long verticals.
- Edges: Paint the latch edge, then the hinge edge last.
B) Flush (Flat) Doors
- Roll the large fields with a mini-roller.
- Lightly “tip off” each section with the brush in the direction of the grain (or vertically if no grain) to remove roller stipple.
- Finish the edges carefully.
If the door is hanging, place a door stop to keep it still as you work.
The “No Brush Marks” Game Plan
- Don’t overload the brush: Dip only 1/3 of the bristles and tap (don’t scrape) on the can’s edge.
- Work in small zones: Keep a wet edge and blend into the last pass.
- Feather your last stroke: Light, long strokes in the direction of the panel or grain.
- Roll, then tip: After rolling a section, immediately lightly glide the brush to erase texture.
- Mind the edges: Runs start here. Wipe drips as they form; don’t overwork half-dried paint.
- Use conditioner when needed: A few capfuls (if the manufacturer allows) can slow drying slightly and help level out the hair.
Dry Time, Recoats, and Handling
Respect the label. Touch-dry is not ready-for-recoat. Many enamels want 4–6 hours before the second coat; some need more. Avoid closing the door fully until the paint has cured enough to resist blocking—often overnight. Use a small felt pad between the door and the stop if you must close it lightly.
Hardware: Remove or Mask?
- Remove if you’re not in a rush. You’ll paint faster and cleaner.
- Mask if you must. Use sharp tape and a craft knife to get crisp circles around latches and hinges. Pull the tape while the paint is soft to avoid tearing.
Second Coat Strategy
Sand lightly with 220 to remove dust nibs and tiny imperfections. Wipe clean. Apply the second coat following the same sequence. Inspect at a low angle, using good light, to catch thin spots or missed corners.
Special Cases by Door Type
- Hollow-Core, Factory-Finished: Bonding primer is your friend. Scuff thoroughly; these surfaces are slick.
- Solid Wood with Knots: Spot-prime knots with a shellac or dedicated stain-blocking primer to prevent bleeding.
- Veneer: Gentle sanding only. Too aggressive and you’ll burn through the thin layer.
- Previously Oil-Painted: Clean, scuff, and use a bonding primer before switching to waterborne enamel.
Color Ideas That Work in Real Homes
- Classic: Soft white (semi-gloss) for a crisp, bright feel.
- Modern: Warm gray or greige in satin with white trim.
- Bold: Charcoal, inky navy, or black for contrast in light rooms.
- Cottage: Muted sage or dusty blue for a relaxed look.
Sample on the door itself; colors read darker on vertical surfaces and near shadowy hallways.
Clean Up and Care
Wrap brushes between coats to keep them from drying out. For water-based paints, rinse until the water runs clear and spin-dry the bristles. For oils, follow the solvent instructions and store safely. Remove tape at a 45° angle while the final coat is just past tacky. Avoid hanging damp towels or wreaths on freshly painted doors for a few days to prevent impressions.
Common Problems—and Quick Fixes
- Brush Marks/Streaks: Too much paint or it started to set. Sand lightly after drying, then recoat with thinner, applying carefully tipped layers.
- Roller Stipple: Use a finer nap (1/4″), roll off excess, and tip with a quality brush.
- Runs/Drips on Edges: Catch them early with a dry brush. If cured, shave carefully with a razor and touch up as needed.
- Tannin or Stain Bleed-Through: Spot-prime with a stain-blocking primer and recoat.
- Blocking (Doors Sticking): Let the paint cure longer. Some paints require several days to reach full hardness; temporarily add felt pads at contact points.
- Fish Eyes (Craters): Usually contamination. Clean thoroughly, sand smooth, prime, and recoat.
Weekend Timeline You Can Follow
Friday Evening
Remove or mask hardware, clean, and patch. Let repairs dry.
Saturday Morning
Sand, degloss if needed, and prime. Light sand once dry.
Saturday Afternoon
First color coat: panels, rails, stiles, then edges. Maintain a wet edge.
Sunday Morning
Light sand to knock down nibs. Second coat.
Sunday Evening
Careful reassembly. Keep doors ajar overnight to avoid sticking.
Tools vs. Technique: Where to Spend
Spend on the brush and the paint. A quality sash brush lays down smoother paint with fewer bristles left behind. High-grade enamels level better and cure harder, which is crucial for high-touch surfaces like doors.
When to Call a Pro
If you’re changing a dozen doors, dealing with heavy stain bleed, or matching a tricky factory finish, a pro crew can deliver quick, spray-quality results. For a single-door refresh or a weekend update, the plan above will get you home.
A Deeper Dive on Method
If you want to compare techniques and products side by side, this guide on the best methods for painting interior doors covers primers, tool selection, and finishing techniques in greater detail. You can review it here: best methods for painting interior doors.
Quick Checklist (Print This)
- Clean thoroughly, rinse, and dry
- Scuff-sand 150–180; fill dents; sand 220
- Bonding or stain-blocking primer as needed
- Mini-roller + sash brush; roll then tip
- Panels → rails → stiles → edges (for paneled doors)
- Respect dry and recoat times
- Light sand between coats for glassy results
- Keep doors slightly open after painting to prevent sticking
FAQs
1) What’s the best paint finish for interior doors?
Semi-gloss is the dependable choice—easy to wipe and durable. Satin works nicely for a softer, modern look. Gloss is striking but shows every flaw.
2) Do I need to prime if the door was already painted?
If the old paint is sound and similar in color, you can sometimes skip a full coat of primer. Still, spot-prime repairs and any bare wood. Use a bonding primer when switching from oil-based to waterborne paint or when painting a slick factory finish.
3) How do I avoid brush marks on paneled doors?
Work in sequence, don’t overload the brush, roll the flats with a fine nap, and “tip off” lightly with the brush while the paint is still wet. Keep your strokes long and with the grain.
4) How long before I can close the door?
Many enamels can be closed gently after several hours, but a full cure can take days. Keep doors ajar overnight and use felt pads to prevent sticking while the coating hardens.
5) Can I spray the doors for a smoother finish?
Yes, spraying can produce an ultra-smooth surface, but prep and masking are more involved. If you spray, still lightly back-brush the panels to prevent sags and ensure even coverage.

Tyler Finnigan, founder of Finn’s Painting Company, brings a lifetime of craftsmanship and dedication to his work. Raised alongside his father, Tyler honed his construction and finishing work skills, learning the value of precision and excellence. After serving in the United States Marine Corps, where he developed discipline and leadership, Tyler expanded his expertise in the luxury sector, mastering high-end project management and exceptional customer service. Today, he combines these experiences to deliver outstanding interior and exterior painting services rooted in integrity and attention to detail. Tyler’s commitment to quality ensures every home shines with beauty and lasting craftsmanship.